Wednesday, 1 October 2014

Pressured 'speed' paint

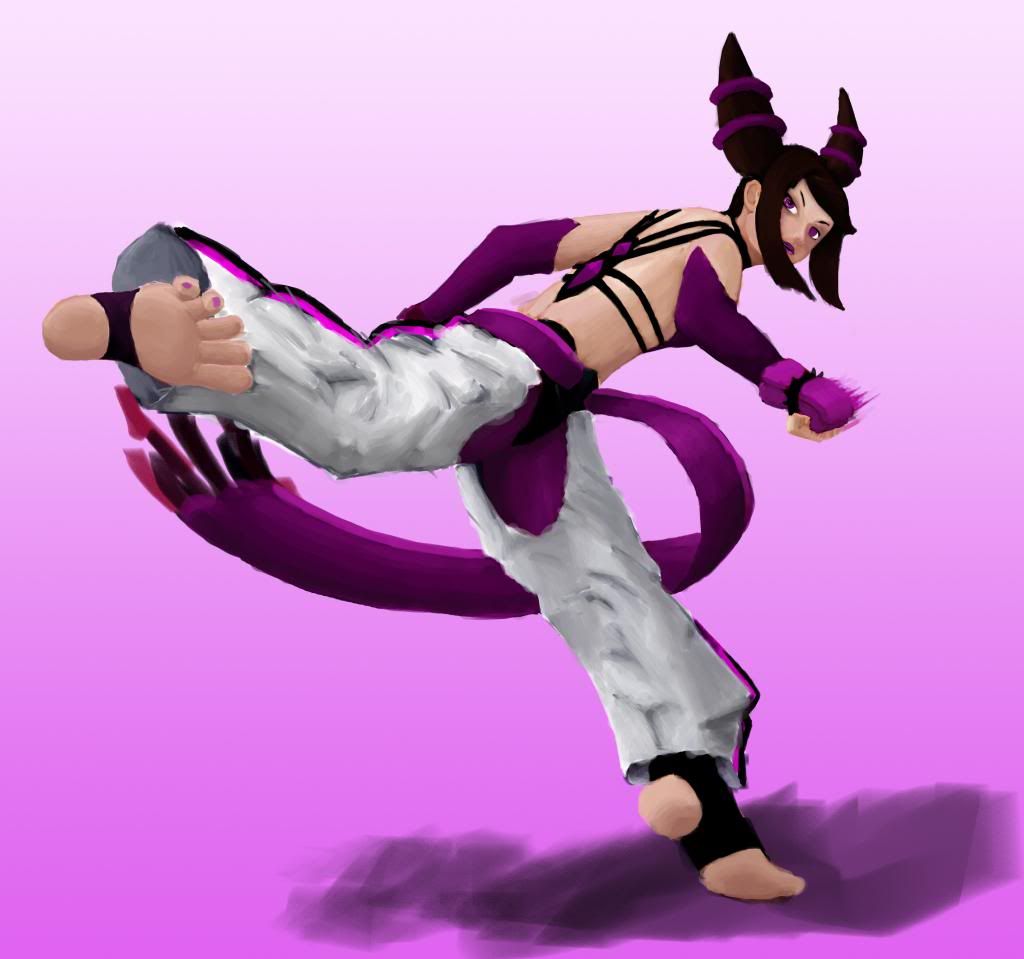
So yesterday, woke up reaaaally early...couldn't sleep. So instead of wasting anytime further trying to catch a few extra z's, i decided to try my hand at digital painting/sketching/making pretty pictures thing.

Started of with no plan, just started sketching...ended up with this.


anyhow, I have an interesting project brewing on my side (other than finishing the tavor paint job). I'll keep you guys (and gals) posted once I advance far enough to share a decent amount of Inf with you guys.

Thursday, 18 September 2014

Mosfet Mayhem

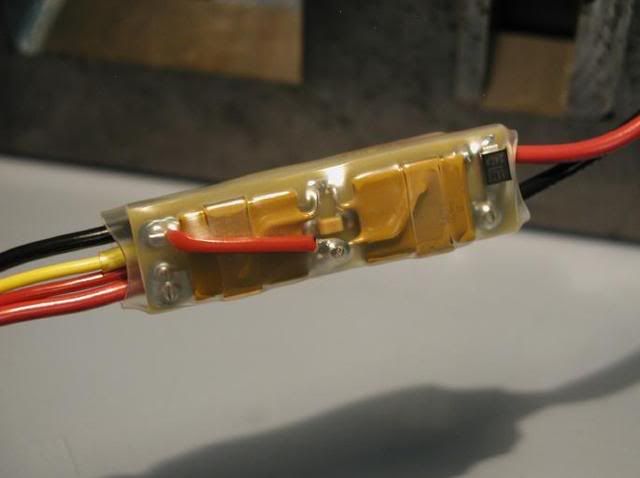
Recently someone asked me where/how I make the mosfets I use in my airsoft rifles. So I decided to share my "secret".

First of, definition on WTF is: Mosfet.
In airsoft terms it is a component that sits between your battery, trigger and motor. It reduces the current traveling through your contact plates of your trigger, extending the life of the trigger plates as well as increasing battery life, trigger response and ROF (rate of fire) [ever so slightly].

There are many different types of mosfets. Some do fancy things like burst fire and active breaking (with fancy micro controllers, wizardry and pixie dust) where as others just drop the current to the trigger.

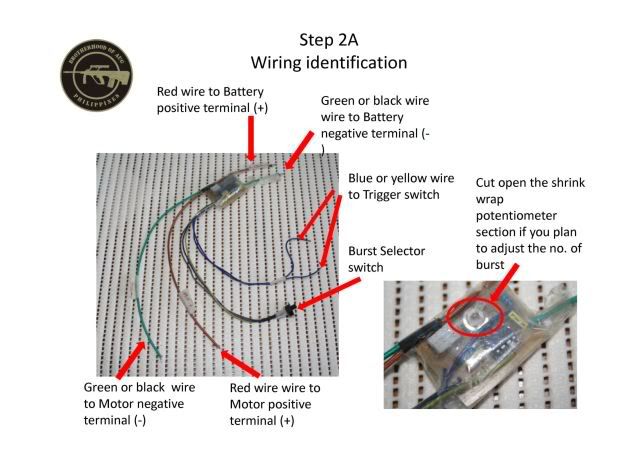
Everything I've learnt, I learn't off the internet. Here are the different sites where I found the different types of DIY mosfets (in near future I'll do my own walk through of the making processes, but for now here are the web sites)

Simple Mosfet (just does the basic current drop to trigger)


Active breaking Mosfet (Does the basic current drop to trigger as well as some fancy foot work in terms of preventing over rotation of the motor/gears)


555 burst Mosfet (Uses a 555 timer chip to do burst fire and the usual current drop to the trigger)


Currently I'm trying to merge the last 2 types of mosfets are one (so, a 555 burst with active breaking). How that goes...I'll let you guys know when I've tested it.

A lot of people are against active breaking on airsoft aeg (automatic electric gun) as it adds extra tension on gears, motor and battery (seeing as it effectively send a reverse current to the motor to stop it from over rotating). I can definitely see their point, but some of my reading up has shown that if done softly/lightly it will not effect your gears/motor/battery.

In any case hope you guys enjoyed/learnt/at least read through this post, If you have any questions or requests I'll look into them and respond promtly.

Cheers

Tuesday, 2 September 2014

Tavor repaint project: Day 3

SOOOooooo...today was a more exciting day in the tavor repaint, you'll see later why.

I began again taping off everything that was not to become orange (leaving the previous tape on...cause that stays black)
Again, 2 light coats, this time Orange (still using Rust_oleum)
And finally, once dried, I removed all the tape (and here comes the exciting part). Boy am I pleasantly surprised at the results.
The plan
Current state
Next steps are cleanup, finer detail and finaly sealing it with a matte finish lacquer. After which I'll install a burst mosfet (I'll make a post about it later) and other electronics.

Anyhow, the next update should be the final one for the paint, so stay tuned to see this baby finished.

Monday, 1 September 2014

Tavor repaint project: Day 2

Soo...day 2 of the tavor build
Not much was done. Mainly stripped out all the internals and covered everything that was not to be painted with painters tape.

I then gave the gun 2 light coats of Rust-oleum white (about 10 min per coat)
Next step will be to tape off anything that will not be orange and do those coats, and then finally some clean up, finer detail and a matte lacquer seal to finish the job.


Sorry for the short up-date, not much to talk about in this step.

Thursday, 28 August 2014

Tavor repaint project: Day 1

Ok, so I decided to start repainting my boring looking Tavor (looks similar to this)
to look like this
Now some of my airsoft buddies are like, "But Jacques, that stands out. Don't make your gun stand out"and I see their point. In field/long range games, camo (or even black) is better than white and orange to blend into the environment, making it harder for your opponent to spot you (unless you are playing in a white and orange environment, that'll show them). But this is my cqb weapon, camo is not going to help much when max range is about 7 meters. So, with that thought, why not make it look a cool as possible...hence the repaint project.

So day one consisted of getting my hands on some Rust-oleum paint (no Krylon, because it seems that you can't find that in South Africa) and some painters tape. I decided to start of with the magazine, as it is a nice simple area to test the paint and masking techniques.

  1. Masked of everything that was not to receive a layer of paint.
  2. Proceeded to spray the white as a base and primer. Did 2 light coats, waiting 15min between coats.
  3. Next I masked of anything that was not to be the second colour (ie orange) and sprayed 2 coats of the second colour onto the mag (again waiting 15min between coats).
  4. Finally after letting it dry for about an hour, proceeded to remove all the masking.
From a distance it look pretty good, on closer inspection the edges of the white are a tad untidy. Unfortunately, seeing that I used a spray paint that bonds with the plastic, scraping the excess paint of is not an viable option (I'll play around with a few other ways of trying to clean it up, like paint thinners, etc.).

Still to-do on the mag is to finish the cross and tidy up, then I'll do the other one before moving onto the next mag.

Stay tuned for updates on this project (and yes there will be updates. Unlike the other ones *cough cough* I already spent money on this project...I'm not willing to see it go to waste).

Wednesday, 20 August 2014

An update (finally)

So someone approached me the other day claiming that a blog needs to be updated regularly with content people want...so I shut him up before he could say anything else, but not before he got me started thinking.
I really Haven't update this thing in a long while, let me see...6 months and 2 days ago, without any advancement on that project...oops.

Now I can't promise that my updating will become better, but I will do my dammest, it's not like I've been doing nothing...Iv;e just bee doing less. When they (some randoms) said that varsity will be hard work...i didn't believe them =/

Any how, back to What I have done, lets see...

First up is some digital drawing/practising I did
Yuri from street fighter


I also did a logo/emblem thing for my local table top/rpg/larp thingy
Also did a few posters for my varsity's anime and gaming society
And a few other posters...but i don't have the rights to post those (some free lance work)

Also did some channel art for a friends YouTube channel 

I've also been playing quite a few airsoft games, but still don't have any way of attaching my gopro wannabe cam, sooooo...no footage yet.

Speaking of airsoft, my current project (for the past few months) is upgrading my Tavor (internally and currently externally)
This is how it's gonna look
Being my cqb weapon, camo won't help much, so I decided to make it look awesome.
(Idea was taken from the CS:GO weapon skin Asiimov)

Other than that, not much happened. I've been playing all the games I can get my hands on in my free time (again, didn't do any game recording....no proof).

Anyway, I should probably pay atention in lecture right now, the math lecturer is giving me funny looks.

Sunday, 16 February 2014

The start of the project: G36

Soo...I recently decided I should start a project where I can up my modeling skills and build up a portfolio piece.

So what I'm doing i I'm recreating my ARES G36C airsoft rifle (everything).
My Gun ^^


So here is the first bit (front grip)

Model
Top

Front

Side

Angled

Turn table

So ya. There is still much to do.
Program: Blender (cycles)

Trophy Project

So a family friend recently finished his 21th Cape Town Cycle Tour , which is quite the achievement. So I thought I'd make a trophy of s...