Hi.
My name is Jacques Botha. 23 years of age, currently a B.Sc. Student at UCT (University of Cape Town, South Africa).
This Blog is place where I can share my projects and interests with the www (World Wide Web).
Here I'll share my sketches, digital and traditional. I'll also be sharing my 3D modelling and game dev projects. Finally any other project I'll partake in will also be shared.
So a family friend recently finished his 21th Cape Town Cycle Tour, which is quite the achievement. So I thought I'd make a trophy of sorts to present to him as a congratulations.
I recently bought myself an "Eleksmaker Elekslaser-a3 pro" with a 7W laser. I was planning to use it to engrave wood and cardboard, try cutting vinyls and its main purpose is for pcb etching which I want to experiment with.
Now...with the addition to the laser, I also have a 3d printer and a "CNC mill" (currently can only cut things out....need to rebuild it). So I saw this as the perfect opportunity to try a project utilizing all of these tools.
Design took way longer than I thought. I went through about 8 complete iterations....just shy of starting manufacturing...but such is things.
In the end I decided on CnC'ing a bike gear from clear acrylic and wet sanding it with a fine grit to give it a milky effect
The proposed gear
One of the failed cuts (the mill is scheduled for a rework soon)
The center piece is to be a piece of wood with Laser engraved details. Unfortunately.....because I didn't understand the laser well enough....I messed up all the wood I was planned to use...So I ended up using some MDF....not great but sill produced a interesting looking result result.
And finally, to tie everything together, a 3D printed 'jig'. Bolted to the acrylic using M5 Bolts (spare parts from building one of my 3d printers) and 3d printed washers.
I printed this, painted it gold and added some basic grunge to make it seem more....gritty.
(I was in a bit of a rush while making this that I seem to have forgotten to take pictures of this components' progress)
I was extremely please to find that I had all the dimensions correct on the first try, giving me a very satisfied feeling.
A tablet stand I printed earlier coming in handy
I decided to paint the stand black, giving the entire piece a sense of....finesse.
I'm pretty happy with how it turned out....and happy to report, so is the recipient.
The final product on the recipient's desk
I feel that next time I do something like this I can definitely improve upon what I've learnt during this endeavour.
Admittedly there has not been an update for a while.
Mostly due to finals happening so close after the hand in date and then me being on vacation (Had vacation job)
But seeing as it is a few (90+) days after Xmas, I might as well sit down and give the conclusion.
The last stretch was filled with nightmares, shortcuts and Macgyver styled fixes to get this project in a finished state for demo.
We learnt a lot, most of which where "don't do these 'x' things before demo", and was able to give a successful demo of the project.
A very "flattering" photo of me explaining the whole system (Yes I'm barefooted at a demo...the mocap didn't sit nicely on my shoes) and Yusri sitting ready at the demo machine.
A few down falls of the project was: Scope, technical issues (wireless prop could not keep a stable connection, streaming to the headset became extremely buggy once anything other than the screen streaming was running...so receiving a message game some issues mid demo, the mocap suit is extremely sensitive to any magnetic interference (So the electrical cables running underneath the floor was giving some tracking issues)
The games difficulty got reduced so that people could actually finish the game in about 5-10 minutes rather than 30-45 min (mostly for the tutors assessing our project)
Visually nothing changed much since the previous update, most of the changes came with Will fixing the Multiplayer aspect (We only tested it locally...so no idea if it would work over the internet) and bug fixes...oh so many bug fixes. (And yet...there remained soooooo many bugs...)
So, on to the results:
Screen shots
Main menu
Starting area with "fellow" AI prisoners.
First encounter with the gaurds
The "battle hall"
The door that I had the most fun animating.
Boss Battle!!!
Controls:
WASD: move in direction
Space: jump
LMB: Light attack
RMB: Heavy Attack
note: attacks, jumping and sprinting uses stamina Game Files: link
Unfortunately...I only have access to a windows build (when trying to build it recently a ton of compile errors arose due to Unity's newer network code. Apologies (I might try and fix it in the future, MP was just SP with one of the other AI prisoners replaced with a friend) Well, that finally concludes this project. It was an interesting experience. I would definitely revisit the VR locomotion...as the method we tried, well, it made me uncomfortable too use...which is a bad sign. I would love to play around with VR again, but next time with a proper VR headset. So until next time, bye bye. Stage 3: Test level
So, as in all games we need a playable level.
Now this didn't need to be this completed but we wanted to give the Artist and the Musician a platform in which they can get a feel for what they will be working with.
I spent two days researching and prototyping level design and on the third day I pitched a "final" level to the team and they liked it. The level was done in Blender.
Note: the player controller is just the basic physics Unity FPV controller with the VR weapon...I needed something for the player to play with. How even...I do have a bit of a bug where if you run straight into the wall at high speed, there is a chance that you'd get stuck. An odd way to get out is turn to face the wall, walk back and fire the weapon.
Pictures:
Note: if you get stuck, and cant get free...just reload the page (the files should be buffered). Bad fix...but this is only a level demo. And yes, we know...getting stuck is frustrating.
So, that is the state of the level till thus far. Will do an update again on when I get the locomotion of the VR player down or the Artist/Musician delivers something.
V2: Started a "Mass Effect-isk" version...scrapped quickly
V3: 'Final' version
V3: alt version
However, originally, we where going to 3d print the prop and create a custom wireless controller....but I decided to save time, I started to retro fit an old airsoft gun and strap a Bluetooth controller internally.
Stripping the internals in prep. Also...seem familiar? O yeah, was the tavor project link
So, I'm doing a Computer Science and Games Development (not to be confused with Design clarification link) and our final project is a "Large" game. We will be using Unity for this project.
Project requirements TL;DR
Needs a 3D environment
2+ independent player gameplay
Use of vfx (particles etc)
AI npc's
Consistent Theme
Sound (sfx, music, etc)
And any other features we wish to add.
Game Design Document
Project Website
We are a team of 3 guys (Male to Female ratio in the course is heavily slanted...there are however female devs...they are just in the minority here with us), all having beards....so we call our self is
The team
Jacques Botha (me) (Front):
Art Director
3D Modeler
Game Developer
VR enthusiast.
William Grant (Mid):
Game Developer
Assistant Writer
Sound Design
Yusri Dollie (back):
Lead Writer
Game Developer
VR enthusiast
And the game we are going to create is called:
Eden's Odyssey - Liberation
Break down of what we are planning to do, and I quote:
"Eden’s Odyssey is a First Person SciFi brawler/shooter, it takes gameplay inspiration from the Dark Souls series of games, with melee dominated combat, and limited healing and checkpoint mechanics. The game allows for 4 players simultaneously, experiencing a mixture of PVP and PVE. Players can work together to overcome challenges and bosses (Note: Bosses do scale with the number of players present in the Arena) alternatively players can choose to fight amongst themselves in an effort to slow other players and gain extra resources (This poses a risk to both the attacking and defending players as you may lose more than you gain when engaging each other) The game is laid out linearly, with branching paths that may lead to traps or dead ends, dead ends may contain special loot which would reward the player for exploring, however progress can only be made along the main linear path. The game ‘ends’ when one player reaches the escape pod and leaves the prison. Thus a player weighs the risk of exploration and the possible benefits of gaining an item advantage, the time wasted doing this and the possibility of being caught in a trap.There is only one escape pod so the first player to reach it would win, this is the source of competitive conflict between players. Players may choose to cooperate or actively compete with against one another. The game supports a specialised boss system which allows each player to engage in their own boss session or share a session (At the cost of increased boss difficulty based on number of players) The deciding factor being whether having more people to make a boss fight easier vs doing it alone in the hopes of getting out sooner and thus reaching the end sooner. Players may choose to directly engage one another in an effort to slow each other down, or steal resources from each other by killing an opponent."
TL;DR:
Science Fiction – Based on a futuristic prison planet
First Person Perspective
1-4 Player Multiplayer (PVE & PVP Hybrid) – Gameplay is both Co-operative and Competitive, players are always in competition with one another but can co-operate to achieve certain goals.
Staged Gameplay- Like many classic games levels lead up to ‘boss' fights
The style will follow a minimalist SciFi Theme, being based in a space based prison designed as a planet it draws inspiration from other prisons depicted in popculture (e.g. Chronicles of Riddick, Guardians of the Galaxy), the major difference being the minimalist texturing style adapted from games like Superhot.
please note I do not own any of the following images, this is purely to convey an idea (..so please don't sue)
And then there is some "back story":
"Eden’s Odyssey is a minimalist FirstPerson science fiction game. Based on a futuristic prison planet where prisoners attempt to get to the planet’s surface in order to escape from captivity and head towards civilization. The player assumes the role either one of the 3 prisoners sequestered to solitary confinement who are unexpectedly released and must now fight their way to the surface and their freedom or the role of the special character AND1, an android prison guard which is suddenly imbued with sentience also fights to escape. As they try to breach the surface, they must fight android guards as well as cybernetically enhanced humans who guard the prison planet. Players can collaborate or compete in order to survive and at the same time they must accomplish goals in order to move through the different stages of the game."
Basic players will be standard mouse and keyboard setup connected to each other via LAN.
However...this post would not make any sense now would it.
Ladies, Gentlemen, spaghetti monsters, lizard people and our robotic overlords. I proudly present to you, the thing that makes this game project actually interesting, non generic and is entirely my responsibility....Project AND1 (Andi)
In essence a VR player wearing a Motion caption suit, holding a weapon prop and of course wearing a form of VR headset...all while being completely wireless from the hosting machine, playing a game with the other players.
Ok, I'm getting a bit ahead of myself here. let me explain the components and how they will interlink to make this part a reality.
The mocap suit:
A while back Yusri, Myself and another gent (not part of the project) back a kickstarter project called Perception Neuron by Noitom. From their site:
PERCEPTION NEURON is the first tool of its kind to deliver SMALL, ADAPTIVE, VERSATILE and AFFORDABLE motion capture technology. The modular system is based on the NEURON, an IMU (Inertial Measurement Unit) composed of a 3-axis GYROSCOPE, 3-axis ACCELEROMETER and 3-axis MAGNETOMETER. The strength of the system lies in Perception Neuron's proprietary Embeded Data Fusion, Human Body Dynamics and Physical Engine algorithms which deliver smooth and true motion with minimal latency.
The PERCEPTION NEURON 9-Axis sensor units output data at 60fps or 120fps*. The data stream is channeled to the HUB where it can then be transferred to a computer in three different ways: (1) via WIFI, (2) via USB or (3) recorded onboard using the built-in micro-SD slot.
PERCEPTION NEURON then connects to the software AXIS Neuron or AXIS Neuron PRO for calibration and management of the system, as well as recording and exporting data files for manipulation in most professional 3D, previz and game development tools.
PERCEPTION NEURON was specially conceived as a professional tool for video game developers, film makers, visual effects professionals, biomechanics researchers, sports and medical analysts, and virtual reality enthusiasts to finally have a flexible and affordable platform to experiment with and push the limits of motion capture.
*60fps: 19 - 32 Neurons, 120fps: 18 Neurons or less
Me rocking the system
Getting this to working in Unity was tricky but finally got it up and running via the Neuron Axis program
The weapon prop:
Still far from done (30-60% in development). The concept is that the player hold a "weapon" with a tracking node. The prop has a wireless controller built in, meaning player pulls the trigger, the characters' weapon fires, etc.
Concept 1:
Current version (modified airsoft rifle):
VR headset:
Originally we where planning on using the varsity's Oculus Dev2, Unfortunately a master student needed it more (and us being in undergrad means he gets preference). However the saying "Necessity is the mother of all the invention" rang true.
Plan B was to use a Google cardboard for the VR player...however getting a mobile game and desktop games to communicate properly as well as having the mocap suit talk to the phone...forget it. Solution? Stream the pc screen wirelessly (at a high refresh-rate) to the phone in the cardboard. It took some research, testing and luck...but finally got that up and running (Using KinoConsole streaming app on phone and server on pc). Unfortunately you need to keep the Google Cardboard to your face with your hands...and seeing as we wanted to allow full body movements (no limitations) I decided to redo the Cardboard and 3d printed one with head straps (with the cardboard's lenses).
So with the ground work laid down, I started trying to pull all together. After about...a month of tinkering and fixing...I got the headset and mocap suit to work simultaneously in unity.
Unity+Mocap+Headset Demo (cringe worthy I know)
More mocap (uncalibrated) testing
So yeah. That's how far i have gotten with this project. The rest of the team was busy with their internships...so the are behind schedule.
Stay tuned for more updates in the coming months. (If you have any question feel free to ask and I'll try and reply to them as soon as I can)
So, 3D printers. The are awesome.
FACT.
Unfortunately, I don't own one (Well I did buy one...but 2 years later I still haven't received it...meh...Ever heard of Buccaneer 3D?...yeah) so the next best thing is to build one.
I'm planning on building a FDM (Fused Deposition Modeling) 3d printer...in essence it's a glorified glue-gun strapped to a CNC. There are other methods of 3D printing such as SLA, DLP, SLS, SLM, EBM and LOM but all are either over complicated or over priced for a mere peasant such as myself to even think to build (let alone buy).
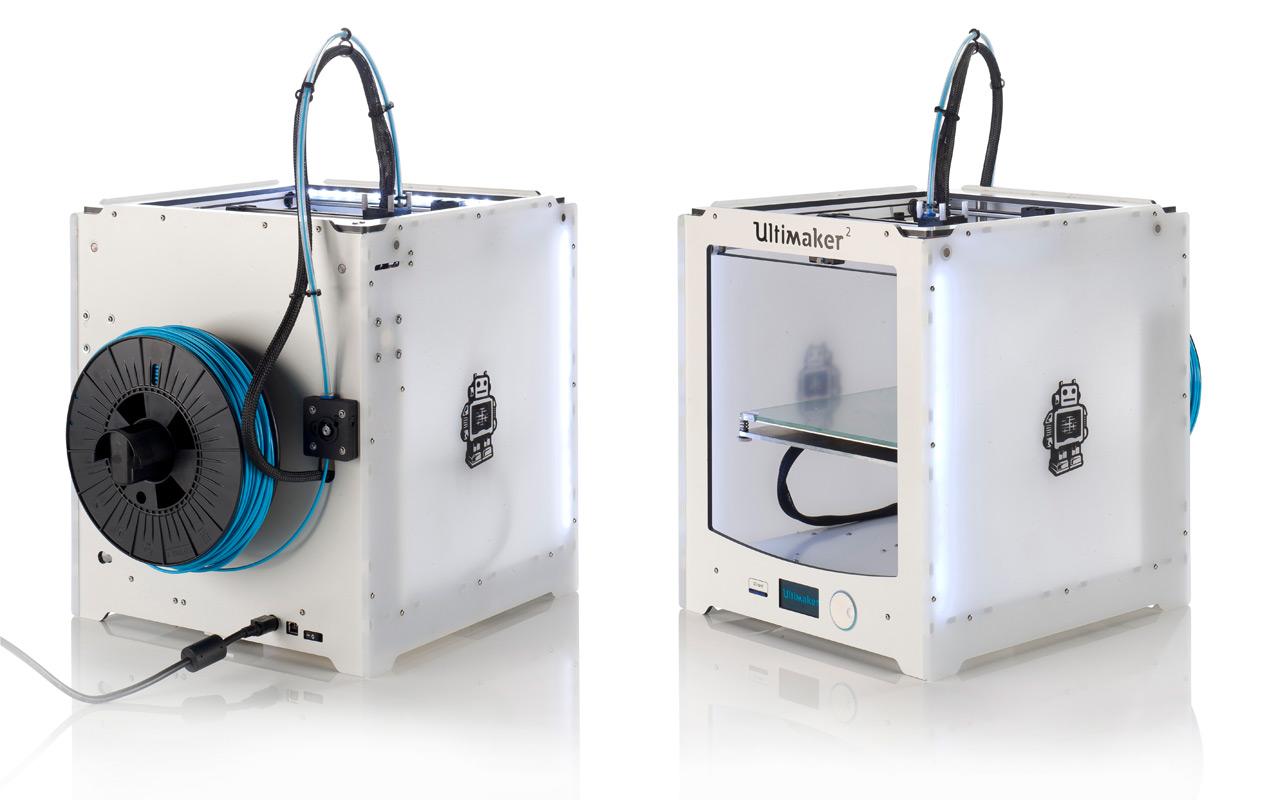
There are many ways FDM printers work, most popularly is the Cartesian system that printers such as the Ultimaker 2 use.
These printers uses basic Cartesian coordinates (X,Y,Z) to create the printed objects.
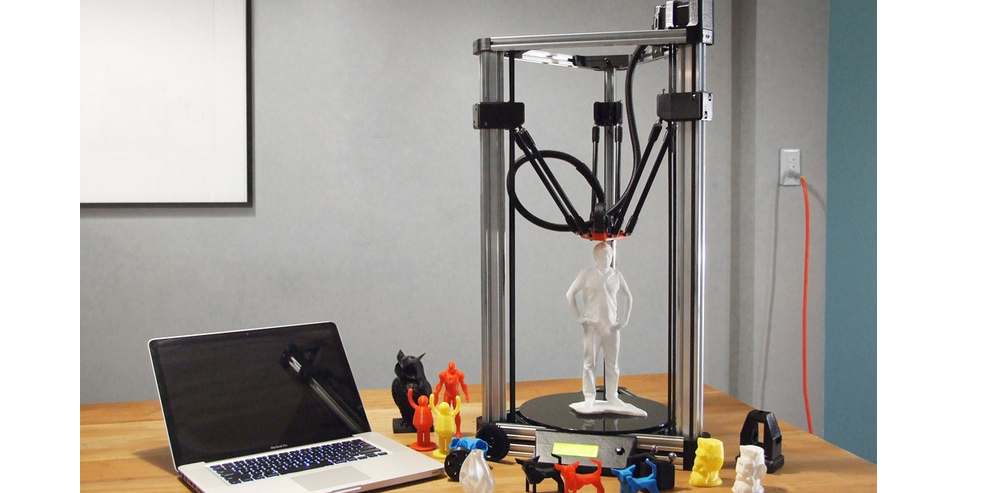
The next, more niche type of FDM printers are Delta printers. The print head is suspended from 3 arms that are controlled along
vertical supports, while the print bed is completely stationary.
The printer I am building is none of these. It's a Scara printer. I'm building a RepRap Morgan.
It uses scara arms to move the printing head int the x-y plane,m making it a very interesting alternative 3D printer. I mean look at this thing move:
First step is to get all the parts 3d printed, with 3D printer...that I don't have...damn.
So after some searching, pleading and bribing I found a friend who would be willing to help out with printing some of the parts I needed. He printed the 2 arms and the extruder.
Blurry photo is blurry...tad hard to take the pic and hold it with the other hand
Decided to use a geared Greg/Wade extruder
I then legged it to my local maker space and used a tiny 3D printer to print the pvc pipe supports.
Next challenge was trying to find the correct pvc pipes...that took about a week, but finally found it.
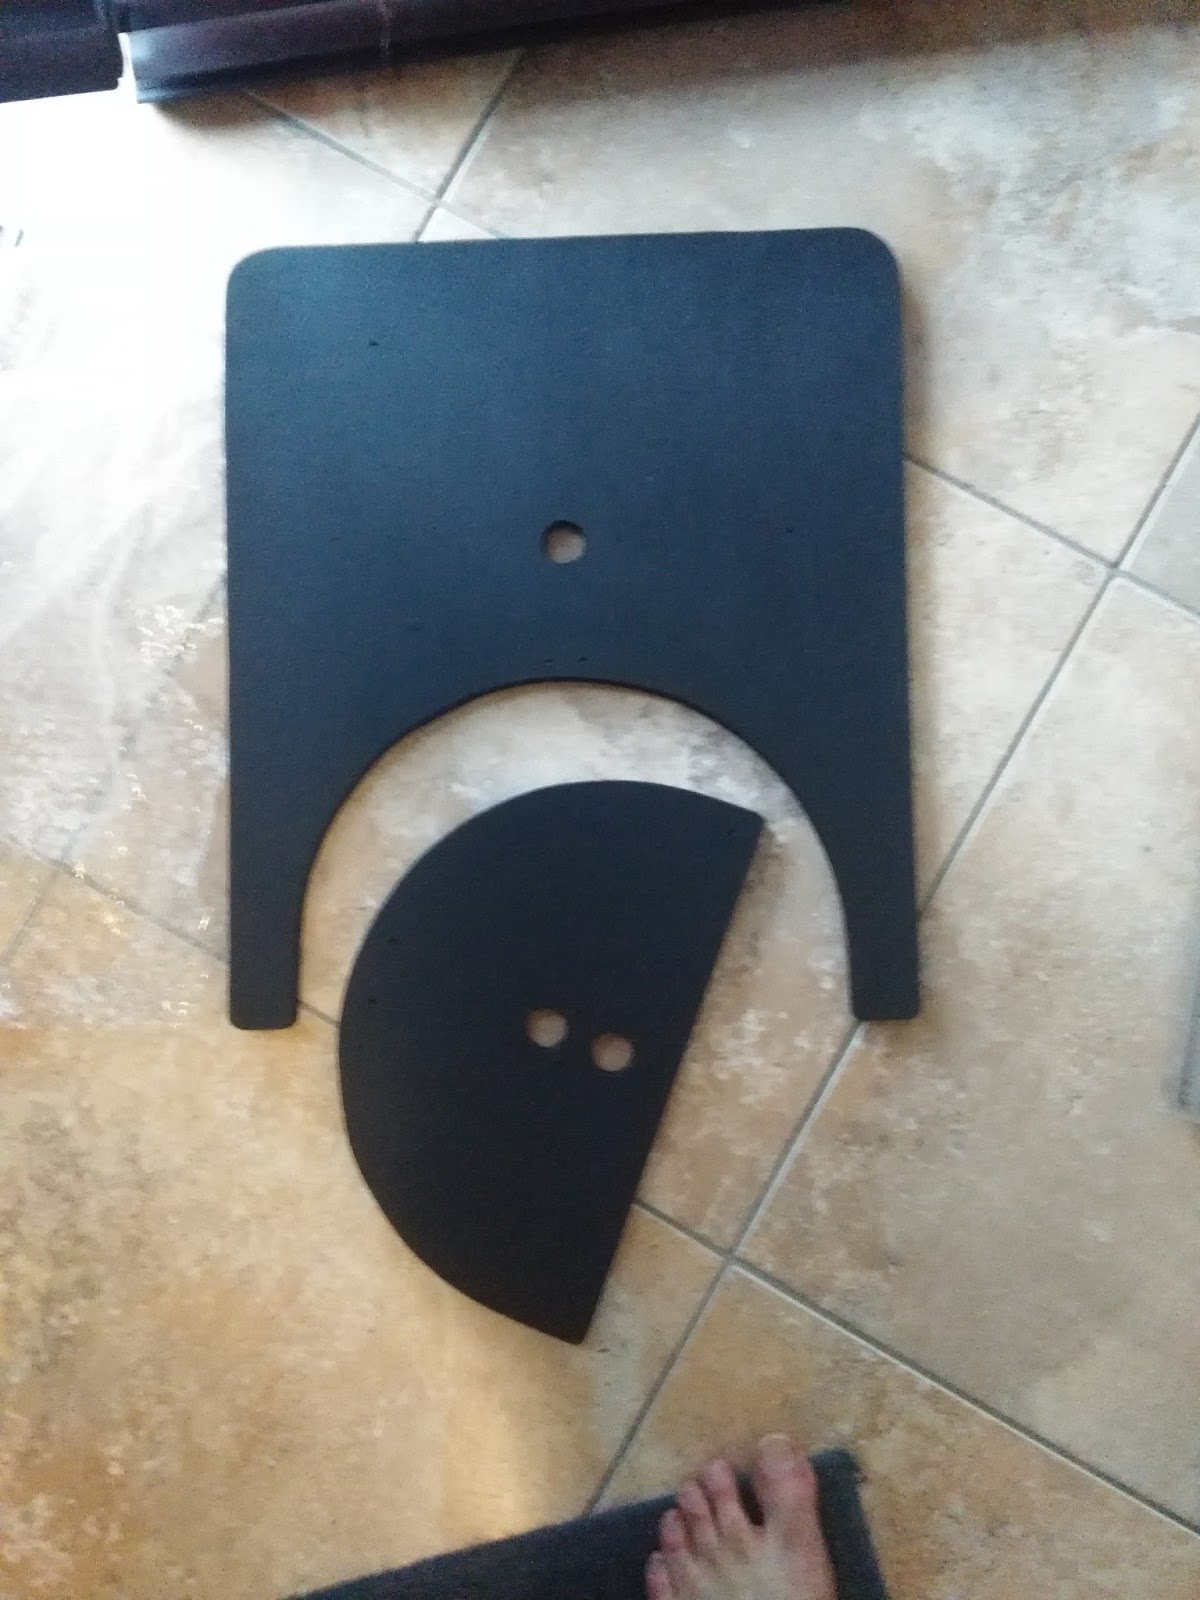
Didn't have access to a laser cutter, so out came the jigsaw.
The wood is mdf...which is brown...not ideal...so I painted it black with some acrylic paint.
Now what colour would look epic with black? Green...nope. Red...nope. ORANGE!!! Damn straight.
This is Rust-Oleum Ultra Cover spray paint, my weapon of choice. Usually lasts me a project or two.
I wanted to do something about the power supply (I will be using a PC ATX power supply) and some form of able management. So I decided on making a "basement" layer of sorts. 80 mm (8cm), ie the height of the standard ATX PSU
Decided to go with a PC ATX power supply as I had one, and is much cheaper relative to its LED PSU counter part.
I snipped and modified the wires according to this RepRap "tut" thing link
Note: THIS WILL VOID ANY WARRANTY OF THE PSU IF YOU OPEN/MODIFY IT
PSU is mounted to the MDF via the fan skrew holes...was hard to keep the fan still inside a closed up PSU.
Starting with the PVC pipe mounting. This went nice and quick. Zero issues here.
Phone camera at night time does weird things with colours.
"Final" structure
After that I started with the wiring...Sooooo many wires xD
After "Doing what I can" with what I had, I had to move to a larger 3d printer as the tiny volume of the maker space printer just wasn't going to cut it.
So...I asked around, and I got access to my varsity's 3d printer (In return, I had to do basic maintenance and upgrades to the printer...win!!!)
Look at that smug face
Final bits (with the "new" wheel designs)
A small hiccup...when I started a print something (in ABS)...and then left for the day...below is what i was greeted to the next day...welp.
Straight out of a horror movie
After cleaning up, hitting reprint (this time in PLA) I started on the Z gantry.
After some wiggling and tweaking, finally got everything in place.
Now for the z axis, Usually one would use a lead screw...but I saw there was a thread-less ball screw concept...I didn't even think twice about any complications that it would bring. I mean. Just look at it.
It is a smooth rod yet it can carry the print bed and print with no backlash...pretty dang epic in my opinion.
Printer progress (excl arms)
I added the arms and started wiring up the heated bed.
First "final" phase. Now I was ready for testing.
The build is now 6 month in...I'm done. Or so I thought. This is what happened when trying to home the printer.
To be honest. I freaked. I thought I broke something. Luckily everything was in one piece (in an unbroken state). I re flashed the firmware, double checked the parameters, etc, etc....to no avail.
Finally disassembled the whole thing, and restarted all the electronics from the start.
Turns out, the Ramps board that I bought never came with micro step bridges....
I grabbed a few, and it solved the majority of the movement issues.
"Finished" state. Sexy looking am I right?
How ever...my struggles didn't end there. Calibrating this was a pain in the rear end.
I spent 2 month on just attempting to calibrate this. And this was The best result I could produce.
Now thats one ugly test cube. In case anyone asks. The nozzle is the correct temp and unclogged.
I mean come on. But to prove, that thing was actually working....where is a vid.
After all this, I've decided to can this build. It's just not reliable enough. The Hall effect sensors used to home the arms just didn't produce a reliable result.
The printer design looks epic, that is why I started this project. However I could not get it to reliably print something, thus deciding to stop.
I have learned a ton while building this. So I will not be giving up on building my own printer. I'm just going to start off with a simple mechanism (Standard Cartesian system).
TLDR:
IF you are planning to build your own first 3d printer...avoid the morgan/scara design. Start with something simpler and attempt this when you have a larger knowledge about printers (or you hate your free time)